
Before you start
Your Apple ID is tied to a phone number for account security. When you change numbers, you need to update the one bound to your Apple ID as well, otherwise it leaves a security hole. Below are two ways to do it — on your phone or on a computer. Either one works.
Order matters: add and verify the new number first, then delete the old one. Doing it the other way round can leave the account unable to verify.
Method 1: Mobile workflow
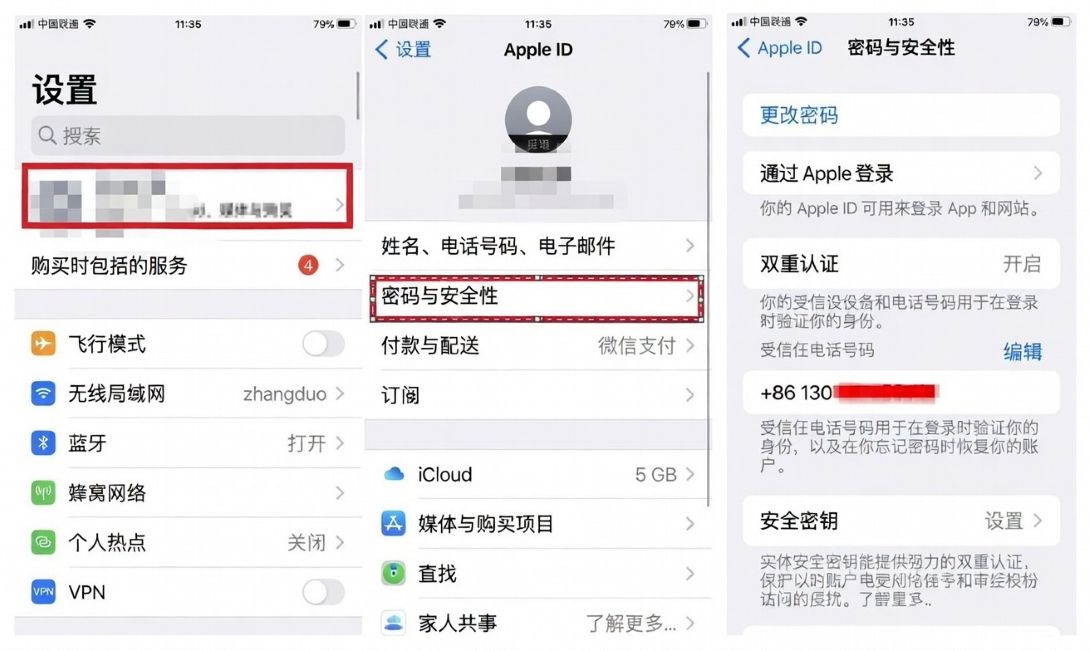
- Open Settings on your phone, tap the Apple ID avatar at the top, then choose Password & Security to see the number currently bound.
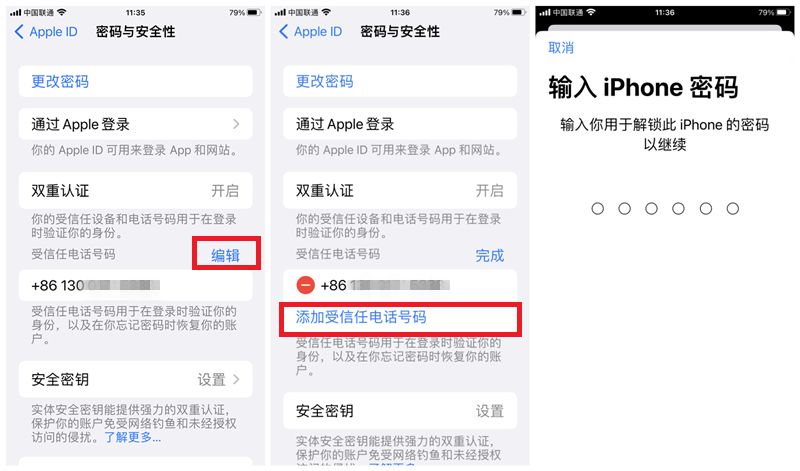
- Tap Edit in the upper-right corner of the number, then tap Add a Trusted Phone Number. You will be asked for your iPhone passcode to verify.
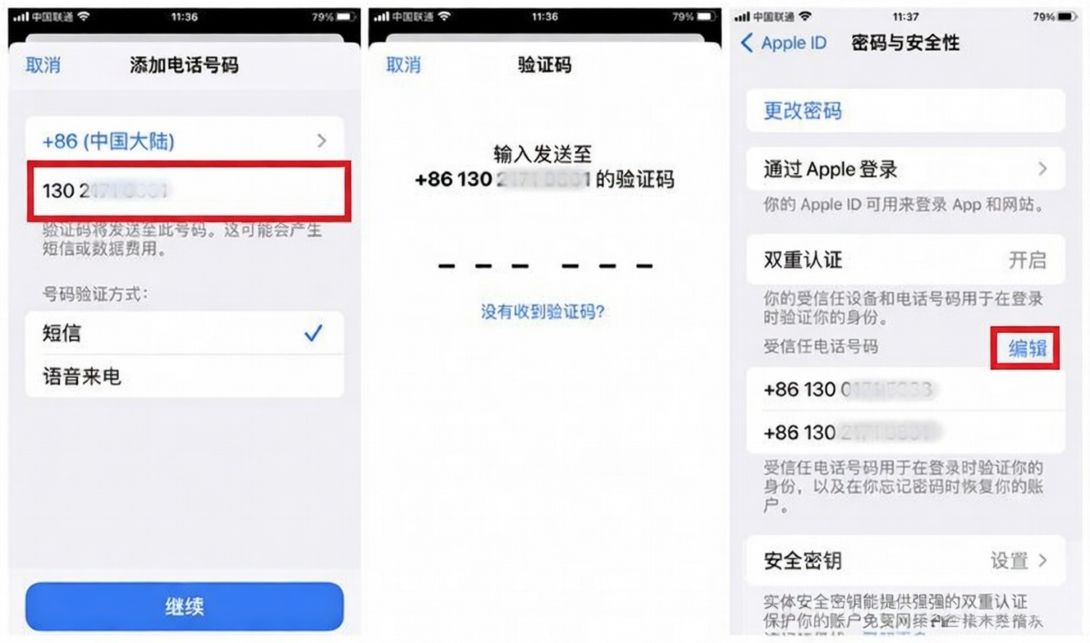
- Enter the new phone number you want to bind. After you tap Continue, a verification code is sent to the new number; enter that code to finish adding it.
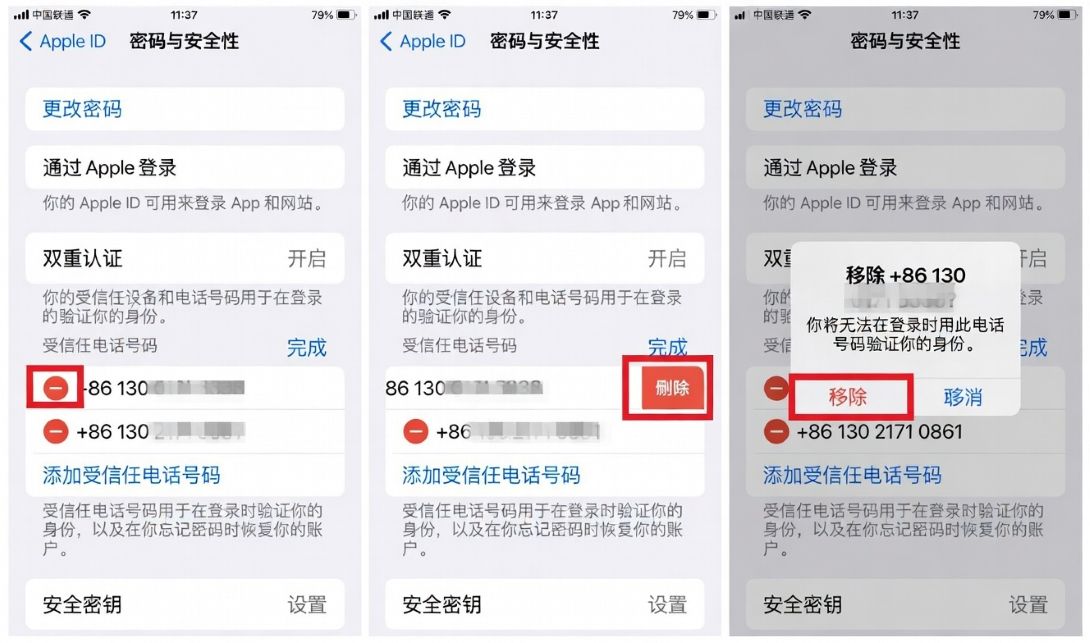
- Once the new number is added, tap Edit again, tap the − sign in front of the old number, and choose Delete → Remove to complete the swap.
Method 2: Desktop workflow
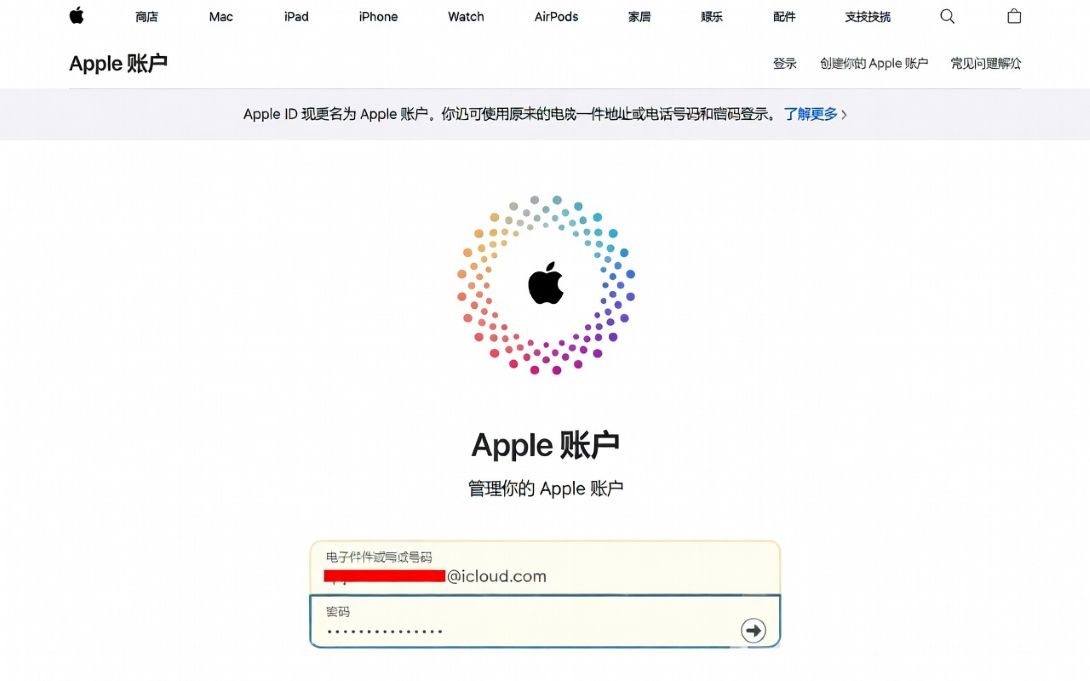
- Open a browser and go to appleid.apple.com. Enter your Apple ID and password, then click the arrow button to sign in.
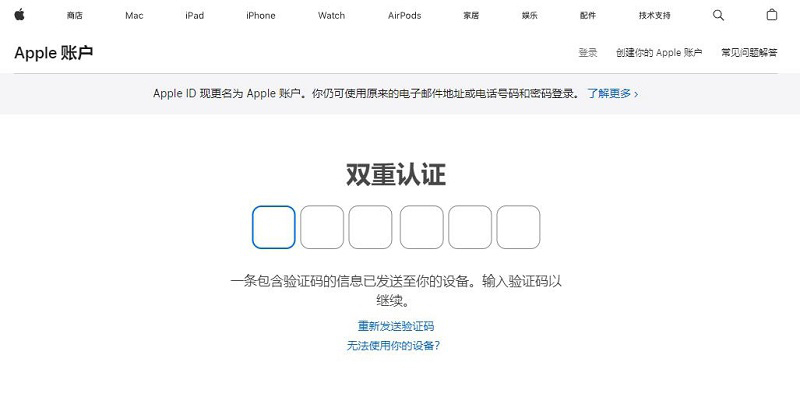
- During sign-in a verification code is sent to your bound phone. Enter it on the page to complete two-factor authentication.
- After signing in, find the Account Security section on the account page and click into it.

- Click the + sign to the right of the number list to start adding a new phone number.

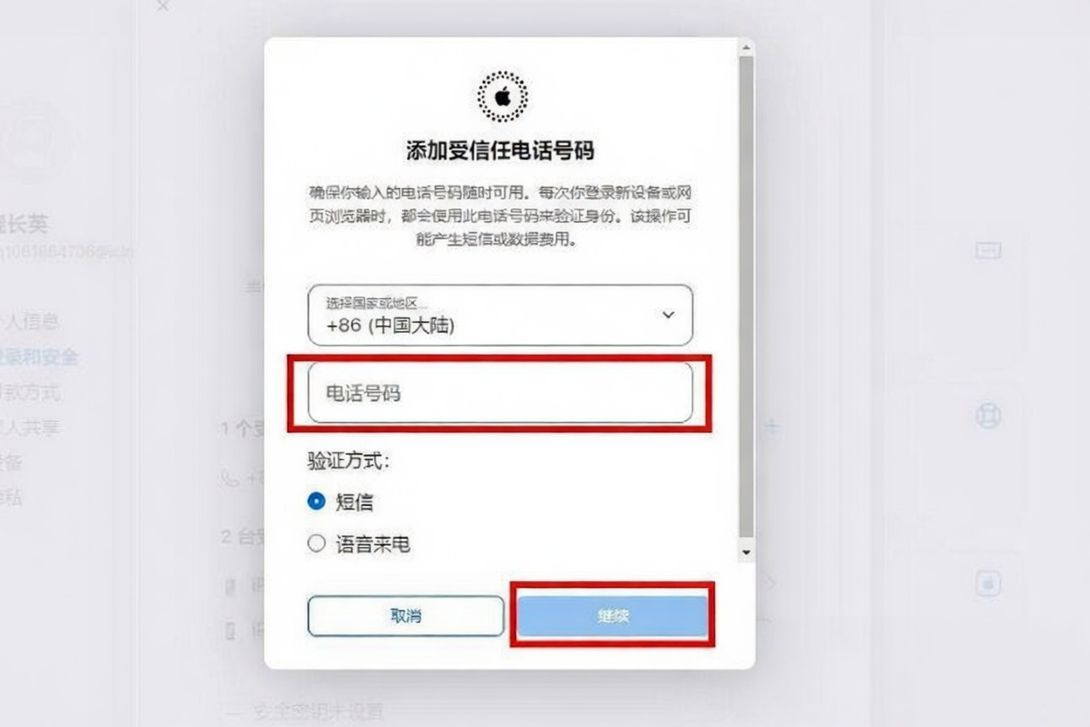
- Type the new phone number into the field, then click Continue.
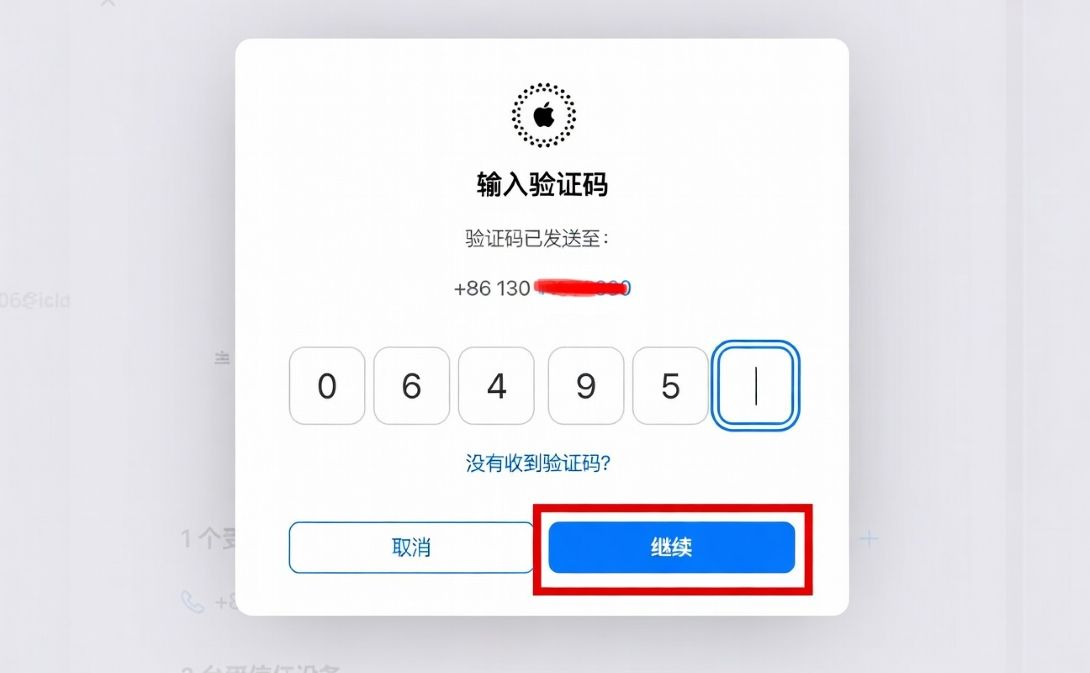
- A verification text is sent to the new number. Enter the code and click Continue to verify.
- Once the new number is verified, click the − sign after the old number to prepare to delete it.

- In the confirmation window, click Remove. The old number is removed and the change is complete.

After you finish, go back to the Password & Security page to confirm the number now shows the new one.
📝 Summary
That is the full process for changing the phone number on an Apple ID. Whether you go through Settings on your phone or appleid.apple.com on a computer, the idea is the same — add and verify the new number first, then delete the old one. Keeping the bound number current is an important part of protecting your account, so do it soon after you change numbers.