
Kiro is AWS’s AI coding IDE. If your account was set up by an administrator or a provider, you don’t sign in with Google or GitHub. You use the “Your organization” option instead. This guide walks through the whole flow with real screenshots.
We’ll cover three things: downloading the Kiro app, the four steps of organization sign-in, and installing and logging in to Kiro CLI.
1. Download and install Kiro
Open the official download page, kiro.dev/downloads, and pick the build that matches your computer:
| System | Download option |
|---|---|
| Mac | Apple Silicon (M-series chips) or Intel |
| Windows | Windows (x64) |
| Linux | Debian/Ubuntu 24+ or Universal |
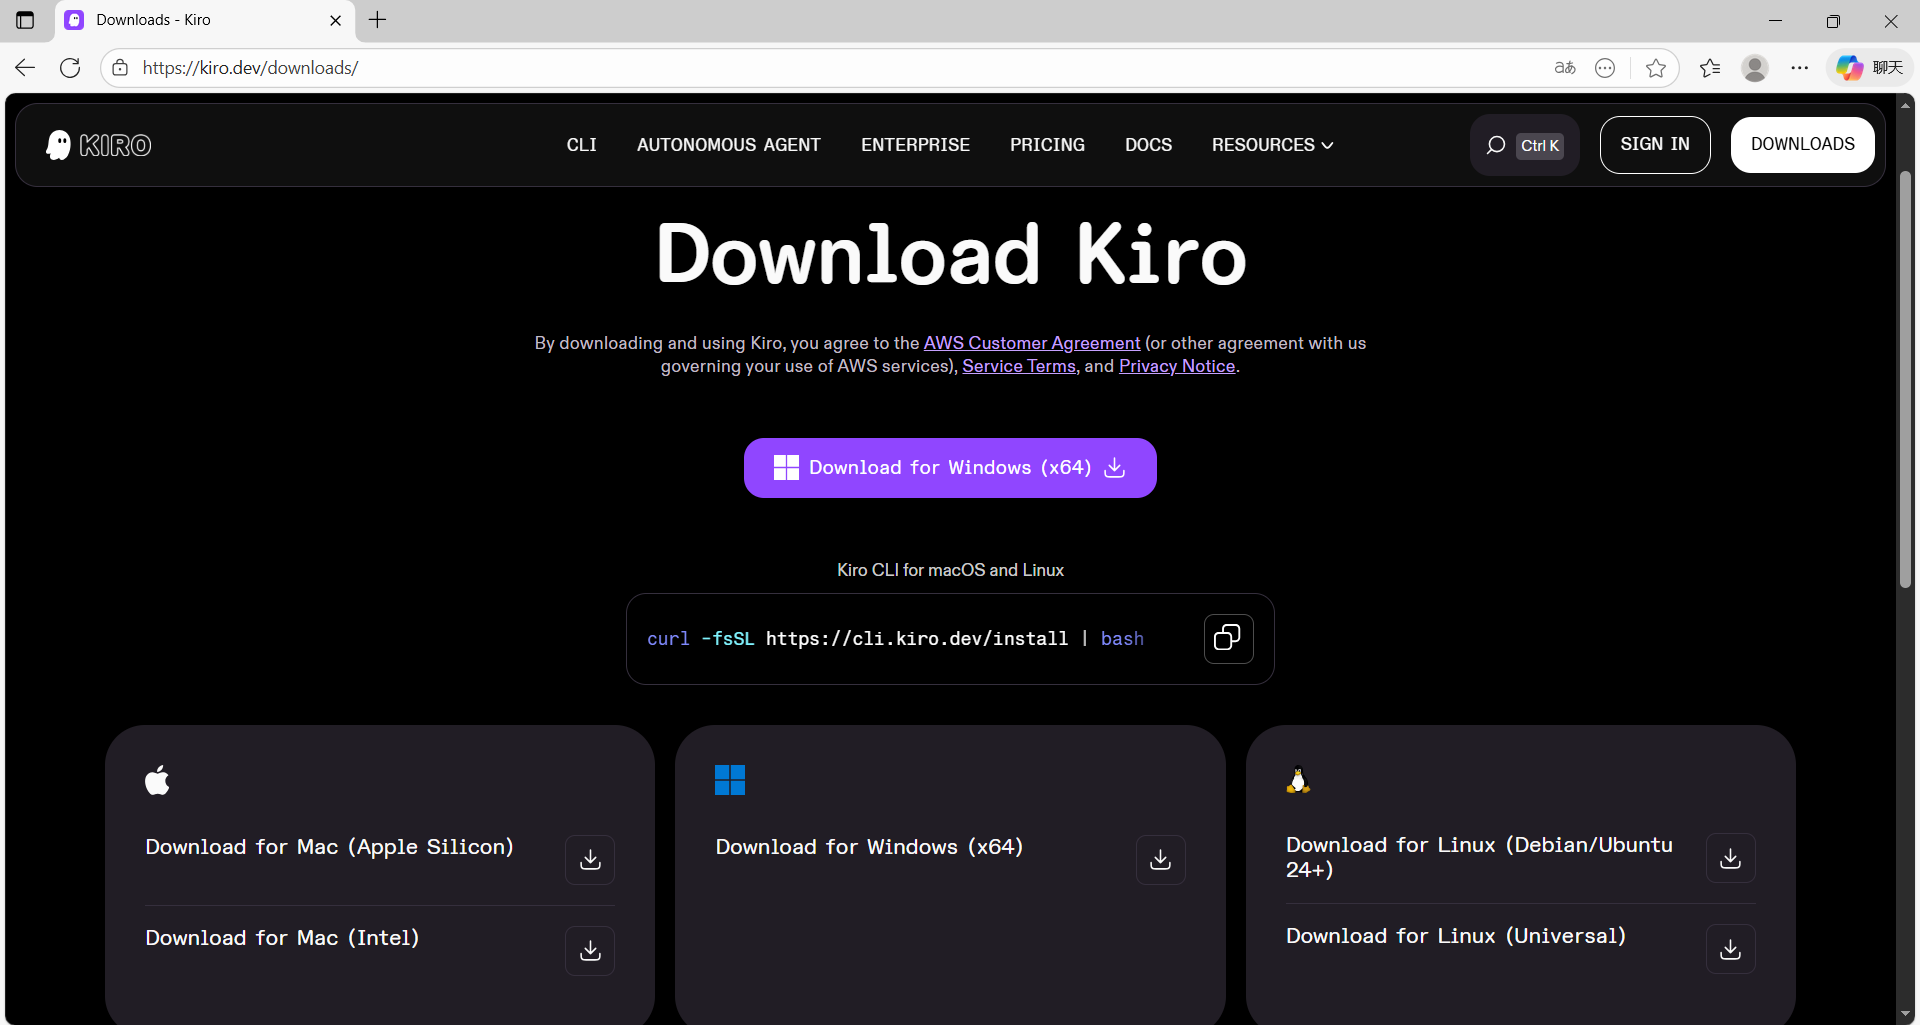
Figure: Pick the build that matches your computer on kiro.dev/downloads
Not sure which Mac you have? Click the Apple menu in the top-left corner and choose “About This Mac”. If you see Apple M1, M2 or similar, pick Apple Silicon. If you see Intel, pick Intel.
2. Choose “Your organization”
Open Kiro after installing and click sign in. The sign-in page offers Google, GitHub, Builder ID and Your organization. Choose the last one, “Your organization”.
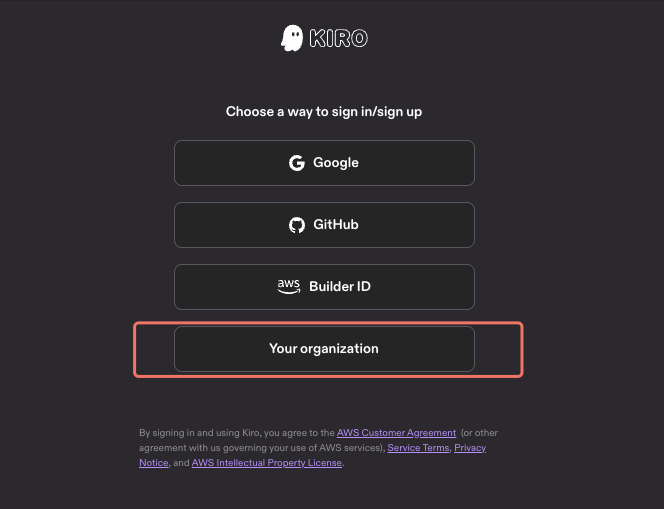
Figure: Choose Your organization at the bottom of the list
Don’t pick Google, GitHub or Builder ID. An organization account can only sign in through Your organization, and the other options lead to different account systems.
3. Enter the start URL
In the “Work email or start URL” box, paste the start URL you received when your account was set up. It looks like https://d-xxxxxxxxxx.awsapps.com/start. Then click Continue. “Select AWS region” is optional, so leave it alone unless your administrator told you otherwise.
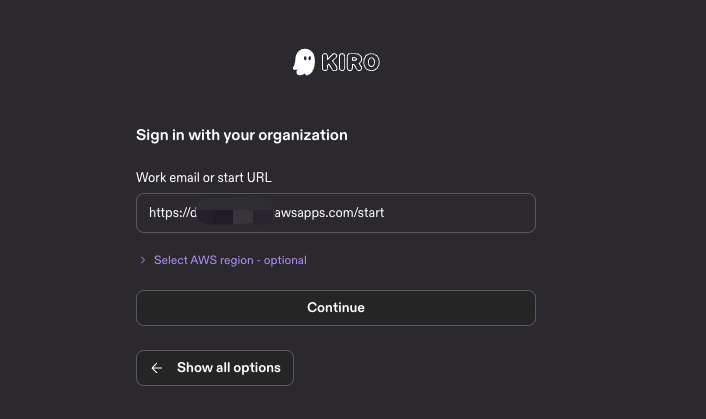
Figure: Paste the start URL, then click Continue
4. Enter your username and password on the AWS page
After you click Continue, your browser opens a new AWS sign-in page:
- Type the username from your activation message and click Next.
- Enter your initial password to finish signing in.
- Approve the prompt in the browser and return to Kiro. Once the app shows you as signed in, you’re ready to go.
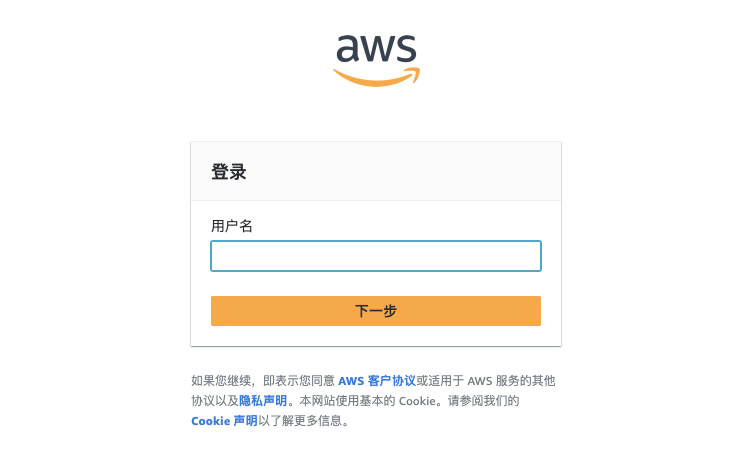
Figure: Enter your username on the AWS page and click Next
If the browser doesn’t open on its own, go back to Kiro and click Continue again, and check that your default browser isn’t blocking pop-ups.
5. Use Kiro CLI (optional)
If you prefer working in the terminal, add Kiro CLI. On Mac and Linux, run the install command from the official site:
curl -fsSL https://cli.kiro.dev/install | bashThen run kiro-cli login, choose “Use with Your Organization”, and finish the same sign-in in your browser. For other install options, see the official guide at kiro.dev/docs/cli/installation.
Your start URL, username and initial password are account credentials. Don’t post them in chats or share screenshots that show them. Screens, option names and commands can change between versions, so check the official Kiro docs if something looks different.
This flow follows the authentication section of the official Kiro docs (kiro.dev/docs/getting-started/authentication). The official documentation is the final reference.
6. Quick troubleshooting
| Problem | What to do |
|---|---|
| You can’t find Your organization | Make sure you installed the latest build from the official site, then reopen the sign-in page |
| Nothing happens after Continue | Check that the start URL is complete with no extra spaces, and that your default browser opens web pages normally |
| AWS says the username or password is wrong | Re-check the username and initial password from your activation message. Both are case-sensitive |
| You get signed out after a while | Click Reconnect in Kiro and re-verify in the browser. You don’t need to re-enter the start URL |
Signing in comes down to four steps: pick Your organization, enter the start URL, then type your username and password on the AWS page. Bookmark your start URL so the next login is one click away. For more AI tool tutorials, browse the guides on 5buyai.com.